
Demolishing a shed can feel like a monumental project, yet once the structure is down, the real challenge often begins: what to do with all the leftover demolition waste. Whether you’re knocking down an old backyard outbuilding or clearing space for a fresh start, understanding the steps to handle materials—ranging from timber and concrete to nails and siding—will help you navigate the cleanup process with less stress and improved efficiency.
Throughout this guide, we will walk you through the process from the moment the walls come down to the final haul‑away. We’ll explore how to assess the volume and type of debris, how to separate materials for recycling or proper disposal, and how to choose the right removal partner for the job. The aim is to provide clear, actionable advice so that your demolition project moves from chaos to clarity—and your site is left clean, safe, and ready for whatever comes next.
Understanding the Scope of Shed Demolition Waste
When a shed comes down, the materials left behind can vary wildly—from untreated wood framing and rotted siding to heavy concrete footings and even old asphalt shingles. Recognising the types of waste involved is your first step. Wood may have nails or be treated with preservatives; concrete might contain embedded rebar; shingles might be mixed with biodegradable materials and asphalt granules. These factors change how the debris must be handled.
At the same time, you’ll want to estimate roughly how much waste you’re dealing with so you can choose the right disposal method and equipment. Misjudging volume or weight can lead to unexpected costs or delays. For instance, if the load includes concrete footings or heavy blocks, the weight alone may exceed typical limits for standard dumpster rentals, which may trigger extra fees or require a special container or service.
Planning Your Waste Removal Strategy
A solid plan will keep the project moving smoothly. First, map out where the debris will be collected on‑site so you avoid blocking pathways or damaging your property. Choose a staging area close to where the shed stood but away from other landscaping or structures to minimise damage and make loading easier. Next, determine the types of containers or trucks you’ll need: will you need a small dumpster, a roll‑off bin, or a full service removal company? Consider the pickup schedule and whether any special permits are needed for placing a container in your yard or driveway.
Additionally, set a timeline for removal work. As you knock down walls and remove supports, debris accumulates rapidly. Scheduling the removal service early—ideally before the project starts—helps avoid sitting on waste for days, which can create hazards, attract pests, or delay subsequent work. And don’t forget to check local regulations: some municipalities have requirements for disposing of treated wood, shingles, concrete, and metal.
Sorting Materials for Disposal and Recycling
Once you begin demolition, segregating your waste by type will drastically ease the removal process. Separate clean wood from treated wood, metals from concrete, and shingles from other roofing debris. Clean, untreated lumber may be suitable for reuse or easier composting; treated wood often cannot and must go to a special facility. Metal items like nails, siding flashings or scrap framing can be collected for recycling..
Proper sorting also supports environmental responsibility. Many waste removal services emphasise recycling and donation of usable materials in addition to landfill diversion. By proactively separating materials, you may be able to reduce the volume of true “waste” and increase the portion diverted for reuse or recycling—this is not just good for the planet but can save you money should you choose a company that gives credit for recyclable materials.
Choosing the Right Waste Removal Service
When it comes to hauling the debris away, you have options. You can rent a container and self‑load, or hire a full service removal crew that handles everything. Renting a dumpster may make sense if you have the manpower and time to load yourself and you’re comfortable handling separation. On the other hand, hiring professionals offers convenience: they arrive, load, and take everything off‑site, sorting and disposing in accordance with local laws.
Check for these qualities in a service provider: transparent pricing with no hidden fees, a commitment to recycling or diversion of materials, scheduled pick‑ups that align with your project timeline, and proper licensing for construction waste disposal. Also look for companies that clearly specify what they can and cannot take for example: treated wood, large concrete slabs, hazardous materials. A good provider will ask what materials you’re removing upfront and give appropriate recommendations so that you aren’t hit with surprise surcharges.
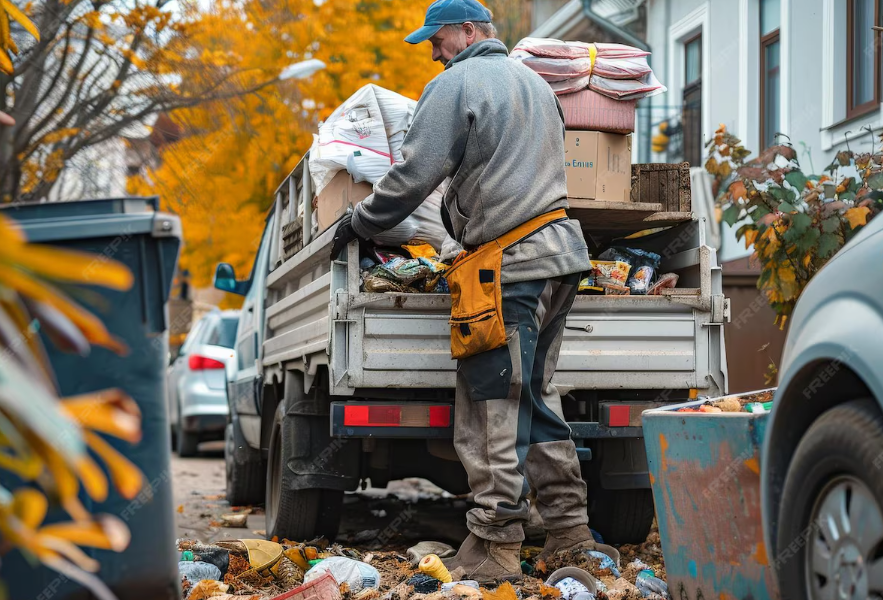
On‑Site Safety and Logistics Considerations
While the focus may be on disposal, you cannot overlook safety or logistics once demolition starts. Ensure the area around the site is secure and clearly marked, so that falling debris or sharp objects won’t endanger workers or bystanders. Wear suitable personal protective equipment (PPE): gloves, eye protection, heavy boots, and possibly respiratory protection if dust or old materials are involved. When loading waste, be mindful of stacking and weight distribution in containers or trucks to prevent shifting and tipping.
Logistically, plan your removal in stages. As you dismantle the shed, try to break down large components before loading—remove nails, strip siding, break up large beams where possible. This speeds up loading and helps fit material more densely, reducing container space and potentially cost. Keep heavy materials like concrete or metal separate so that their weight can be properly assessed—many haulers charge by weight for these items.
Environmental and Regulatory Compliance
The disposal of demolition waste is not simply a matter of hauling it away—it has legal and environmental dimensions. Many regions require waste to be transported and disposed of via licensed facilities. Old materials such as treated lumber, asbestos‑bearing shingles, or lead‑painted wood may be subject to special rules. Ensuring that your hauler uses permitted disposal sites and provides documentation or a manifest can protect you from liability.
From an environmental standpoint, choosing a waste‑removal service committed to recycling or donations helps reduce landfill waste and gains you credibility as a responsible homeowner or contractor. The company you hire should be able to provide you with an invoice or receipt showing how materials were recycled or disposed of. For large jobs, you may want to check whether the hauler is registered with relevant local or state waste‑management agencies and whether they provide diversion reporting.
Minimizing Costs and Maximizing Efficiency
Demolition waste removal can become expensive if not managed well. You can reduce costs by reducing volume: remove nails, bolts, non‑structural items, and separate materials in advance so that expensive “heavy” materials (concrete, stone) don’t fill up containers meant for lighter waste. Using a hauler or dumpster sized appropriately for your workload is crucial—you don’t want to rent an oversized container for half a load, nor want to overfill and risk a second pickup.
Time is money, too: ensure the pickup schedule aligns with your demolition timeline so you’re not paying extra days for waiting. If you use a full service hauler, choosing one that works quickly and loads carefully means less disruption to your overall project schedule. Also, ask upfront about weight limits, load composition, extra fees for bulk materials, and whether they provide clear terms.
Post‑Removal Site Cleanup and Finish Work
Once the bulk of the demolition waste is gone, you’re not yet done. The final cleanup is just as important. Sweep and rake the site to remove nails, splinters, and small debris that may have escaped loading. If your demolition was on a slab, inspect for cracks, protrusions, or any leftover anchor bolts. If the removal company included a “final clean‑up” after loadout, ensure they fulfilled that promise and check your site yourself.
Then prepare the area for whatever comes next—whether that’s landscaping, construction, or simply leaving an open space. If the ground needs leveling, top soiling, or repairing, doing that soon after removal avoids weed growth or settling problems. Keeping the site clean and free from hidden junk means a smoother transition to the next phase.
When to Call in the Professionals
Sometimes the best decision is to let professionals handle the entire process—from demolition to waste removal. If your shed is large, uses heavy concrete foundations, is built with treated timber, or is in a tight space with restricted access, a full service provider can save you effort, risk, and time. Professionals bring equipment, experience, and disposal networks that eliminate many of the headaches of DIY.
Choosing a professional also makes sense if you’re facing deadlines or want minimal disruption. A contractor who offers end‑to‑end service will coordinate the demo, waste removal, and final cleanup seamlessly. You benefit from a single point of contact, reduced coordination efforts, and often, better pricing due to their scale. If you find a hauler who offers clear pricing, flexible scheduling, and environmentally responsible disposal practices, you’re not just hiring a service—you’re investing in peace of mind.
Conclusion
Demolishing a shed can open up opportunities—whether you’re planning a new garden space, expanding your yard, or simply reclaiming space—but it also brings with it the challenge of dealing with what’s left behind. By understanding the types of waste you’re dealing with, planning the logistics and removal strategy carefully, sorting materials responsibly, and selecting the right service partner, you position yourself for a smoother and more cost‑effective cleanup. Paying attention to onsite safety, regulatory compliance, environmental impact, cost management, and final site condition ensures that the process is efficient, responsible, and aligned with your goals.
When you’re ready to tackle the job in the Ventura, CA area, consider partnering with Mobile Dump Junk Removal—they specialize in efficient junk and debris removal and strive for eco‑friendly practices. Reach out at (805) 751‑3744 or via email at mobiledumpremoval@gmail.com to schedule your cleanup.